 Save to Pinterest
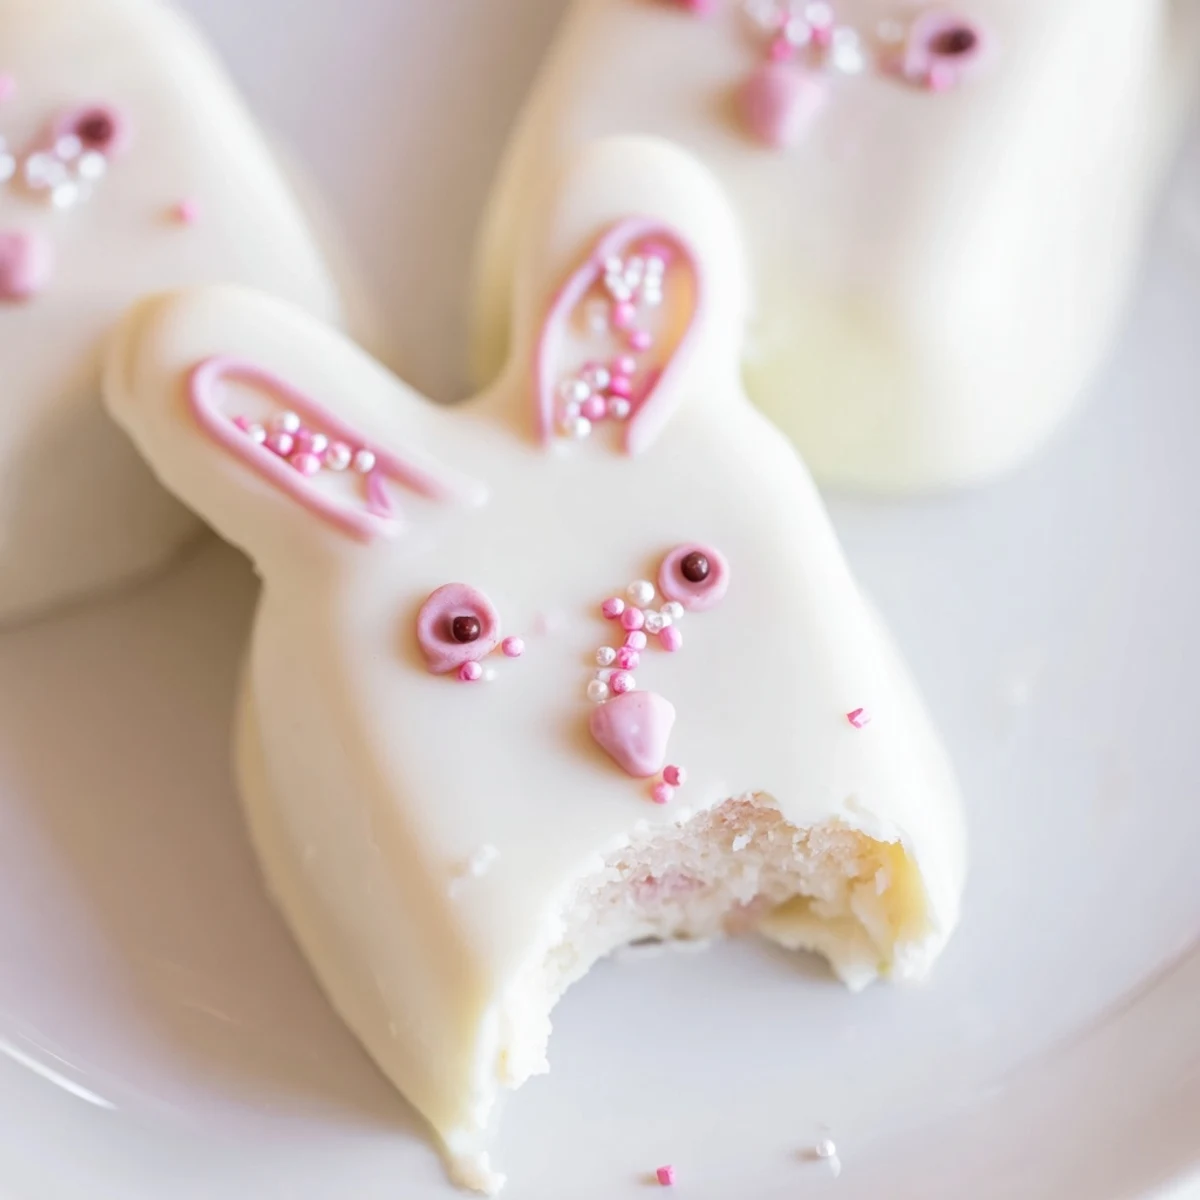
 These delightful bunny-shaped treats combine moist vanilla cake with a rich white chocolate coating, creating the perfect festive dessert for your Easter celebration. The cake mixture uses simple ingredients like cream cheese, butter, and vanilla extract to achieve a dough-like consistency that holds its shape beautifully when formed into adorable bunny faces.
The process involves shaping the cake mixture into flattened ovals, inserting sticks, and chilling until firm before dipping into melted white chocolate. While the coating is still soft, you can add candy eyes, sprinkles, or fondant decorations to bring your bunny characters to life. The entire preparation takes just over an hour, yielding eight charming cakesicles that will delight both children and adults alike.
Customization options abound—try different cake flavors like chocolate or lemon, swirl pink food coloring into the white chocolate for a marbled effect, or get creative with fondant bunny ears and noses. Store these treats in an airtight container in the refrigerator for up to three days, making them perfect for preparing ahead of your spring festivities.
My kitchen became a whimsical wonderland last Easter when I decided to turn cake crumbs into edible art. I'd been staring at a leftover vanilla cake from my daughter's birthday, and something about the cheerful spring energy outside made me grab those white chocolate melts from the pantry. Standing there with sticky cream cheese fingers and bunny-shaped visions, I realized this was exactly the kind of messy, magical moment holidays are made for.
The first batch I made had lopsided ears and chocolate smudges for cheeks, but watching my niece's eyes light up when she saw them made every imperfection feel intentional. We set up a decorating station with pastel sprinkles scattered across the table like confetti, creating bunny faces while Easter parade music played from the speaker. Now they're the most requested treat in our house, and I've learned that the slightly crooked ones actually have more character.
Ingredients
- Vanilla cake crumbs: The foundation of everything, whether from a homemade cake or store-bought cupcakes, they provide the perfect moist texture that holds together beautifully when mixed with cream cheese
- Cream cheese: This is the magical binder that transforms dry crumbs into a moldable dough-like consistency that will never fall apart when dipped
- Unsalted butter: Adds richness and helps create that smooth, fudgy texture inside the chocolate shell
- Powdered sugar: Just enough sweetness to balance the tanginess of the cream cheese without making the filling cloyingly sweet
- Vanilla extract: The secret ingredient that elevates the flavor profile and makes everything taste professionally homemade
- White chocolate: Creates that gorgeous, smooth coating that sets into a perfect shell and pairs dreamily with vanilla cake
- Edible gel food coloring: Optional but absolutely essential for giving your bunnies those adorable pink noses and pastel ear details
- Cakesicle sticks: Transform these from ordinary cake pops into proper Easter treats that are easy to display and serve
- Decorations: Candy eyes, sprinkles, or fondant pieces are what give each bunny its unique personality
Instructions
- Mix your cake base:
- Combine cake crumbs, cream cheese, butter, powdered sugar, and vanilla in a medium bowl, mixing with clean hands or a spatula until you have a dough that holds together when squeezed
- Shape your bunnies:
- Divide the mixture into 8 equal portions and gently press each into a flattened oval with slightly pointed ears, working the dough until it feels smooth and pliable
- Add the sticks:
- Carefully insert a cakesicle stick into the bottom center of each bunny shape, pressing gently but firmly so the stick feels secure and stable
- Chill before dipping:
- Place your shaped bunnies on a parchment-lined tray and refrigerate for 20 to 30 minutes until they're firm to the touch, which prevents them from sliding off the sticks
- Melt the chocolate:
- Heat white chocolate in a microwave-safe bowl in 30-second intervals, stirring between each burst until you have a silky, pourable consistency
- Dip and coat:
- Hold each cakesicle by the stick and dip it completely into the melted chocolate, then gently tap against the bowl edge to let excess chocolate drip off
- Decorate quickly:
- While the coating is still wet and tacky, immediately add candy eyes, sprinkle whiskers, or fondant ears so everything adheres perfectly without needing extra glue
- Set and serve:
- Let the decorated cakesicles stand at room temperature until the chocolate is completely firm, or pop them in the fridge for 10 minutes if you're impatient like me
 Save to Pinterest
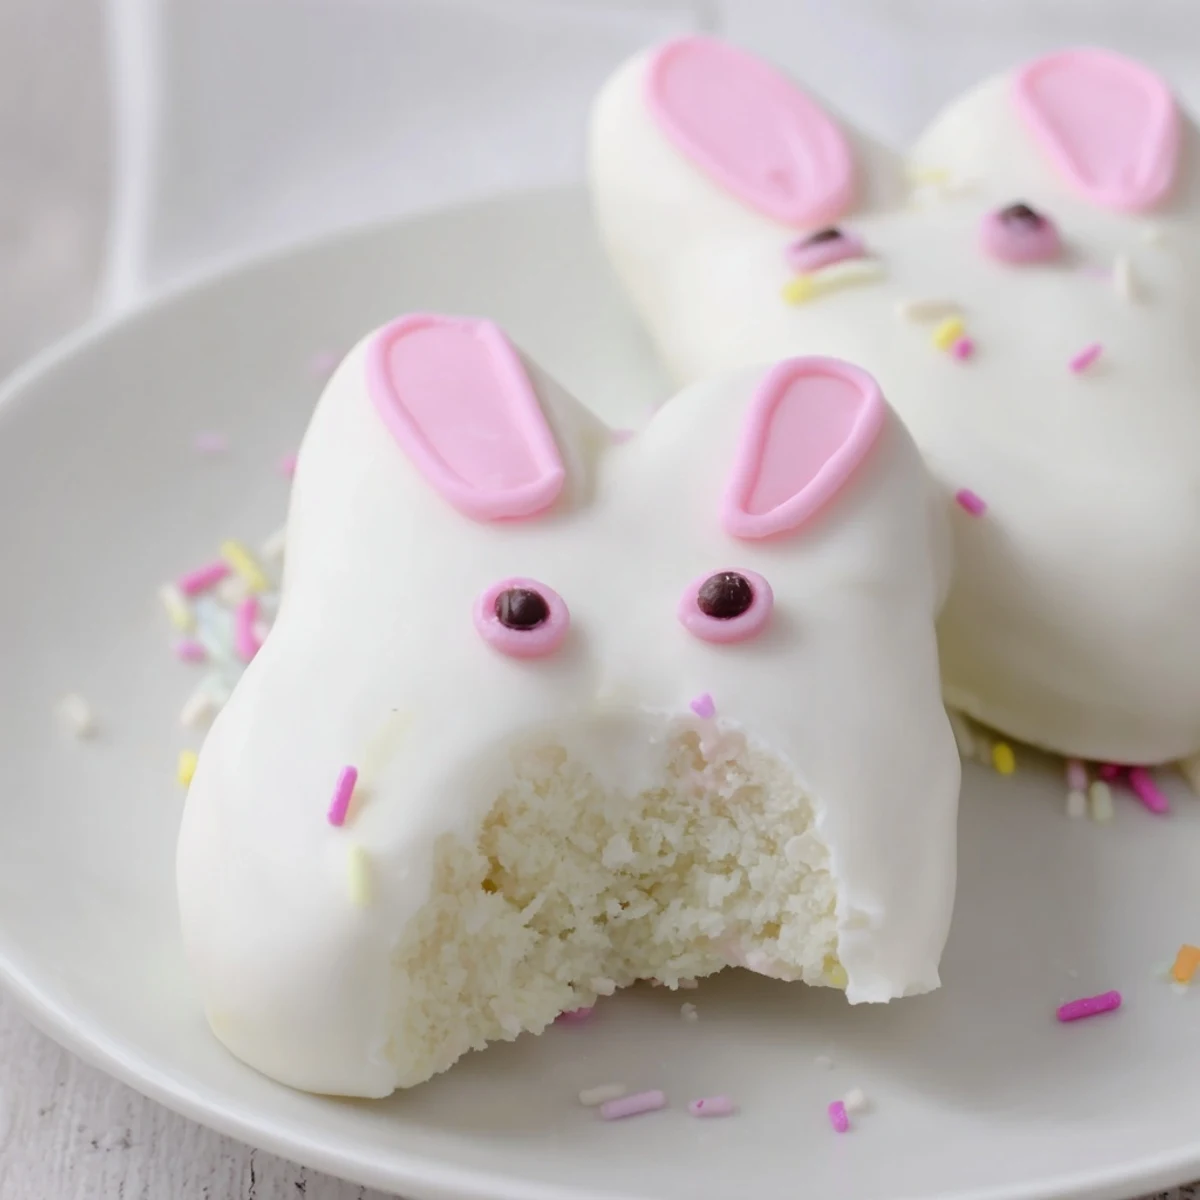
 Last year, my neighbor's kids came over for an Easter decorating party and the memory of chocolate-smeared faces and creative bunny designs still makes me smile. They insisted on giving every bunny a name and backstory, and I'm pretty sure Mr. Whiskers and Princess Fluffington were the most delicious characters we've ever created. The best part was watching them carefully choose each sprinkle placement like true artists at work.
Getting Creative With Flavors
While vanilla and white chocolate is a classic combination, I've discovered that chocolate cake crumbs with a dark chocolate coating creates an incredibly sophisticated version. Lemon cake with a pastel yellow coating tastes like spring sunshine, and red velvet with white chocolate looks absolutely stunning on an Easter dessert table.
Making Ahead And Storage
I learned the hard way that these are best made no more than two days before your celebration, as the cake inside can start to get slightly soft from the moisture in the cream cheese. Store them in an airtight container between sheets of parchment paper, separating each layer to prevent any unfortunate chocolate smudges or sticking.
Display Ideas For Your Easter Table
Create a stunning centerpiece by filling a decorative basket with shredded Easter grass and standing your cakesicles upright, almost like a little edible bouquet. Mason jars filled with pastel jelly beans make perfect holders, and I've even pressed them into a styrofoam wreath form covered in moss for an impressive dessert wall.
- Use edible glitter spray on the white coating before it sets for an extra magical shimmer
- Consider making a few with bow ties made from fruit leather for boy bunnies
- Set up a toppings bar at your Easter gathering so guests can customize their own cakesicle
 Save to Pinterest
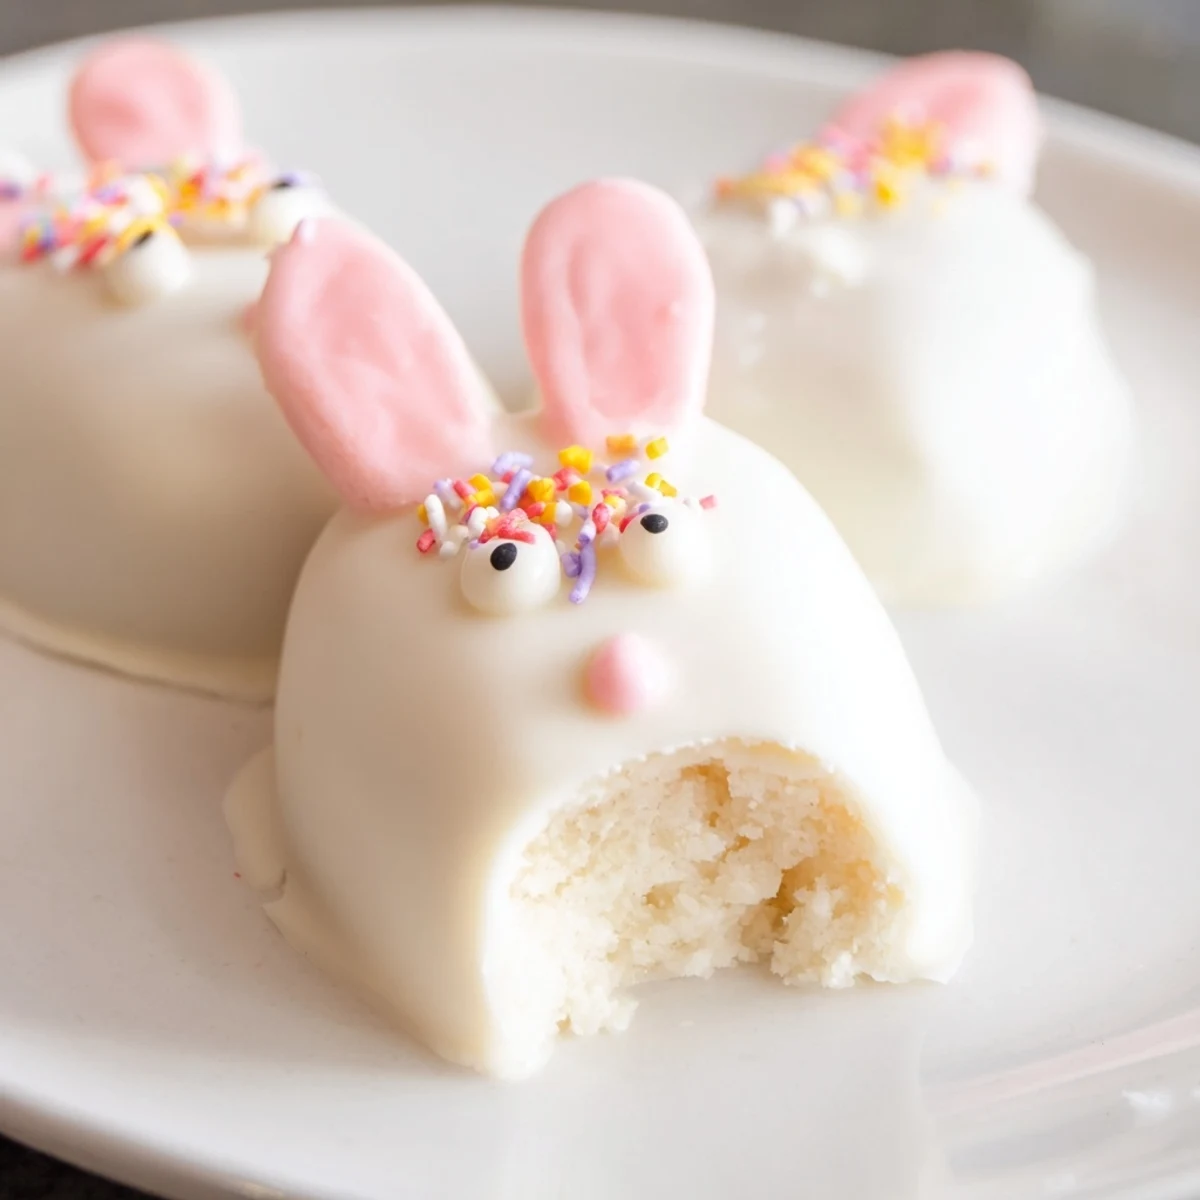
 There's something deeply satisfying about turning simple cake scraps into something that brings such pure joy to Easter celebrations. These little bunnies might take some patience, but seeing them lined up on the dessert table, each one with its own personality, makes every sticky finger worth it.
Recipe FAQs
- → How far in advance can I make these cakesicles?
-
You can prepare these cakesicles up to 3 days in advance when stored properly in an airtight container in the refrigerator. The coating helps keep the cake moist, and they maintain their shape beautifully when chilled.
- → Can I use store-bought cake for the crumbs?
-
Absolutely! Store-bought cake or cupcakes work perfectly for creating the cake crumbs. Simply crumble your preferred vanilla or other flavored cake and mix with the binding ingredients to form your dough.
- → What's the best way to melt the white chocolate?
-
Melt white chocolate in a microwave-safe bowl using 30-second intervals, stirring thoroughly between each burst. This prevents scorching and ensures smooth, even melting. You can also use a double boiler on the stovetop if preferred.
- → Do I need a special mold to make bunny shapes?
-
While cakesicle molds help create uniform shapes, they're not essential. You can hand-shape the cake mixture into flattened bunny face ovals, just ensure they're firm enough to hold their shape after refrigerating before dipping.
- → Can I freeze these cakesicles for longer storage?
-
Yes, these freeze well for up to 1 month. Place them in a single layer on a baking sheet until frozen solid, then transfer to an airtight container or freezer bag. Thaw in the refrigerator before serving.
- → What alternatives work for bunny decorations?
-
Beyond candy eyes and sprinkles, try fondant ears and noses, modeling chocolate features, pretzel sticks for whiskers, or pipe melted chocolate dots for facial details. Edible food coloring pens work great for adding small details.
