 Save to Pinterest
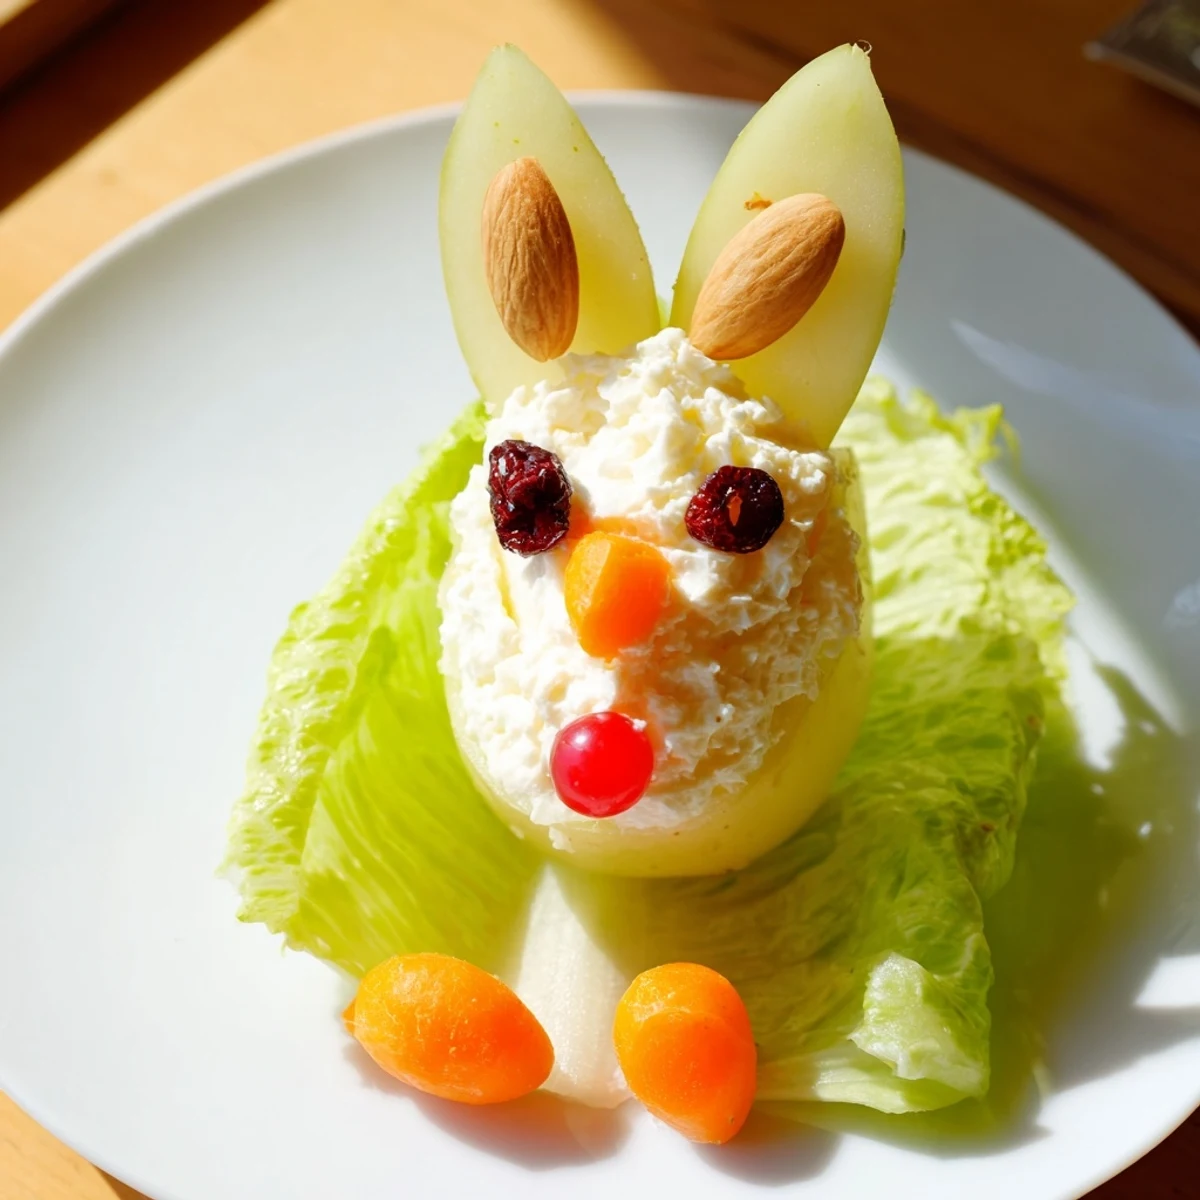
 Create these charming pear-shaped bunnies in just 15 minutes for a delightful addition to your spring table. Start by arranging crisp lettuce leaves as a grassy foundation, then nestle tender pear halves atop each bed. Fluffy cottage cheese forms whimsical tails at the narrow end, while sliced almonds stand perky as ears. Tiny currants become watchful eyes, with cherry noses adding pops of color. Thin carrot rounds transform into delicate feet and playful whiskers.
Children especially love helping assemble these edible creatures, making them ideal for Easter brunch or birthday celebrations. The combination of sweet fruit, creamy dairy, and fresh vegetables offers a balanced bite that appeals to both young and adult palates alike.
Last Easter, my seven-year-old niece asked if we could make bunnies for brunch. I panicked for about three seconds before realizing I could turn fruit salad into something magical. The way her eyes lit up when she saw pear halves with almond ears sitting on lettuce leaves made the whole morning feel like pure childhood wonder.
My grandmother used to make something similar for our Easter egg hunts, though she used whipped cream tails. Last spring I served these at a brunch, and honestly the adults were just as delighted as the children. Sometimes food tastes better when it makes you giggle first.
Ingredients
- 2 ripe pear halves: Canned or poached work beautifully because they hold that cute bunny shape without falling apart
- 4 large lettuce leaves: Choose sturdy leaves like romaine or butter lettuce to create a perfect grassy bed
- 1 medium carrot: You will need this for tiny whiskers and feet, so pick one that is straight and easy to slice
- 4 tbsp cottage cheese: Makes the fluffiest little tails, though whipped cream works if you want something sweeter
- 8 mini raisins: These become your bunny eyes and somehow make each pear feel like it has a personality
- 4 sliced almonds: Position these carefully at the wider end for ears that stand up properly
- 4 cherries or grapes: A bright red nose brings the whole bunny face together beautifully
Instructions
- Prepare the bunny beds:
- Arrange lettuce leaves on small plates, creating a fresh foundation for each pear bunny.
- Position the pear bodies:
- Place pear halves cut side down on lettuce leaves with the narrow end facing forward.
- Fluff the cottontails:
- Scoop cottage cheese at the narrow end of each pear, adding a tiny mayonnaise dab for extra fluffiness.
- Carve tiny features:
- Slice carrot into thin rounds, then carefully cut small feet and delicate whiskers with a paring knife.
- Attach perky ears:
- Gently press sliced almonds into the wider end of each pear at a slight angle.
- Bring them to life:
- Place raisin eyes and cherry noses, then arrange carrot feet and whiskers at the front.
 Save to Pinterest
 My nephew named his pear bunny Mr. Whiskers and refused to eat him until after dessert. That is the moment I realized these are not really salads at all, they are edible memories in the making.
Making Ahead
I have learned the hard way that these little bunnies do not sit well. The cottage cheese gets watery and almonds slide right off if they wait too long. Assemble everything except the cottage cheese tails ahead of time, keeping the pears covered in the refrigerator until you are ready to serve.
Creative Variations
Sometimes I swap cottage cheese for whipped cream or even tiny marshmallows when I want something sweeter. Fresh pears work beautifully in autumn, just poach them until tender before assembling. Lettuce cups can replace leaves if you want something more contained and easier for little hands to hold.
Serving Suggestions
These pear bunnies shine brightest at spring gatherings and childrens birthday parties. Serve them alongside brunch favorites or as a light dessert that feels playful rather than heavy.
- Set up a bunny decorating station and let kids create their own faces
- Pair with hard boiled eggs for a complete Easter themed meal
- Offer extra cottage cheese on the side for those who love it
 Save to Pinterest
 There is something wonderful about turning simple ingredients into joy. Watching someone discover their food can be playful reminds me why I started cooking in the first place.
Recipe FAQs
- → Can I use fresh pears instead of canned?
-
Fresh pears work beautifully when poached until just tender. Simply simmer them in light syrup or water for 5-8 minutes until they yield slightly to gentle pressure, then cool completely before assembling your bunnies.
- → What alternatives work for dairy-free versions?
-
Replace cottage cheese with coconut cream, dairy-free whipped topping, or even mashed avocado for creamy tails. Verify that your mayonnaise substitute is egg-free if needed for specific dietary requirements.
- → How far in advance can I prepare these?
-
Assemble your pear bunnies within 2 hours of serving for best appearance. The moisture from pears and cottage cheese can cause lettuce to wilt and decorations to slide if left longer. Prep all components separately and combine just before guests arrive.
- → What other decorations can I use?
-
Get creative with mini chocolate chips for eyes, small strawberry pieces for noses, or shredded coconut for fluffy tails. Banana slices, blueberries, and thin apple strips also offer fun alternatives for personalizing each bunny character.
- → Can these be made nut-free for allergies?
-
Substitute sliced almonds with carrot slivers, celery pieces, or apple skin strips for ears. Always consider your guests' specific allergies and adjust decorations accordingly while maintaining the adorable bunny silhouette.
- → What's the best way to slice carrot details?
-
Use a sharp paring knife to cut thin rounds from the carrot, then carefully trim small triangles for feet and matchstick strips for whiskers. Take your time with these delicate cuts—the precise details bring each bunny personality to life.
