 Save to Pinterest
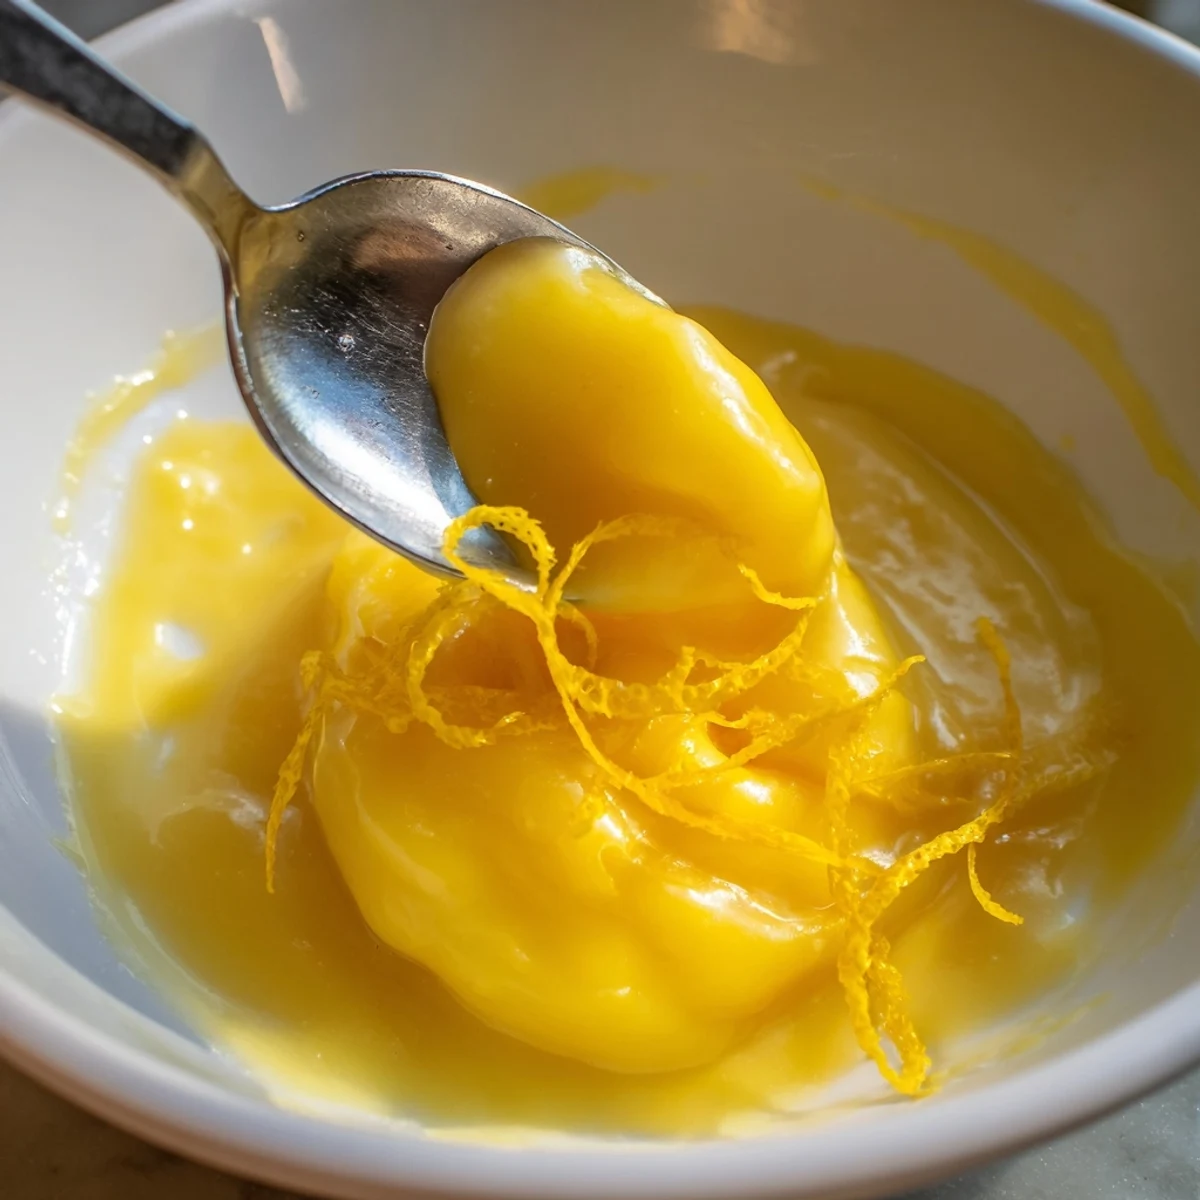
 Silky lemon curd made by whisking eggs and sugar with lemon zest and juice, then gently cooking over simmering water until the mixture thickens and coats a spoon (about 8–10 minutes). Remove from heat, whisk in cubed butter for a glossy finish, strain for extra smoothness, cool and jar. Yields ~2 cups, ready in 20 minutes and keeps chilled up to 2 weeks; swap plant butter for a dairy-free version.
The first time I made lemon curd, I didn’t realize how intoxicating the citrus aroma would be as it thickened on the stove. My kitchen became a tiny sun-drenched corner of summer, even though it was late autumn outside. The sound of the whisk tapping the edge of the bowl made me oddly meditative. There’s something quietly thrilling about watching a handful of simple ingredients transform into silky-smooth gold.
I remember bringing a jar of this freshly made lemon curd to a friend’s afternoon tea one blustery Sunday, and we found ourselves eating it straight from the spoon before the teapot had even cooled. Since then, I can’t help but think of laughter and mismatched teacups whenever a batch is bubbling away on the stove.
Ingredients
- 4 large eggs: They’re essential for that dreamy, custard-like texture—whisk thoroughly to avoid streaks.
- 4 tablespoons unsalted butter, cubed: Adds a creamy richness and helps the curd set with a glossy finish; adding it at the end keeps things wonderfully smooth.
- 3 large lemons (zest and juice; about 1 tablespoon zest, 120 ml juice): The trick is to zest before juicing and use fresh lemons for the brightest flavor.
- 200 g (1 cup) granulated sugar: Balances the tartness; I sometimes rub the zest into the sugar first to release more fragrant oils.
Instructions
- Get everything ready:
- Gather all your ingredients and equipment—the curd comes together quickly, so having everything measured out saves frantic scrambling.
- Whisk eggs and sugar:
- In a heatproof bowl, combine the eggs and sugar, whisking briskly until the mixture is pale and smooth, with no visible streaks.
- Add lemon zest and juice:
- Stir in the fresh zest and juice; breathe deeply, the scent is almost as nice as the taste.
- Cook gently:
- Set the bowl over barely simmering water, ensuring it doesn’t touch, and whisk steadily—this gentle heat is the secret to perfect curd.
- Thicken to perfection:
- Keep whisking until the mixture thickens to the point it coats the back of a spoon, about 8 to 10 minutes—the color will deepen and the texture will become luxuriously thick.
- Finish with butter:
- Take off the heat and add the butter cubes, stirring until melted for that final creamy sheen.
- Strain for smoothness:
- Pour the curd through a fine-mesh sieve into a clean bowl, catching any stray zest or bits for the silkiest result.
- Cool and store:
- Let it cool, then spoon into sterilized jars—refrigerate and try not to sneak too many tastes while it sets.
 Save to Pinterest
 I’ll never forget the look on my niece’s face the first time she tried a dollop of this lemon curd on a warm piece of toast—she grinned so wide, I knew I had to double the next batch. It turned a regular Saturday morning into something we still laugh about, as she insisted it tasted like “sunshine in a jar.”
Making Smoother Lemon Curd Every Time
After a few experiments, I started rubbing the lemon zest into the sugar before whisking with the eggs, which somehow makes the flavor more vivid and the scent linger in the kitchen. The double boiler setup always intimidated me before, but once I realized gentle simmering was the key, my curd stopped splitting. Now, I just enjoy the rhythmic whisking and watch for that magical moment when the curd clings to the spoon.
Storing and Serving Ideas
I like to pour the finished curd into small jars for easy gifting—or for sneaky midnight snacks. It’s at its best after a few hours in the fridge, when the flavors mellow and the texture firms up just enough to hold its shape on a tart. One friend even stirs a spoonful into vanilla yogurt for an instant dessert, and I can confirm it’s irresistible.
Troubleshooting and Extra Tricks
Don’t worry if it takes a minute longer than you expect for the curd to thicken; just keep the heat gentle and trust the process. If your curd looks a little grainy, give it an extra strain through the sieve or blend it briefly. Sometimes I freeze a little leftover curd in ice cube trays for single-serve treats.
- If your lemons are small, use four instead of three to reach enough juice.
- Always zest before juicing to make life easier.
- Sterilize your jars in advance for maximum freshness.
 Save to Pinterest
 Lemon curd manages to taste like pure sunshine and comfort at the same time. I hope your kitchen becomes just as bright as mine did the first time you give it a try.
Recipe FAQs
- → How do I prevent the curd from curdling?
-
Cook gently over a simmer in a double boiler and whisk continuously. Avoid direct high heat and remove from the heat as soon as it thickens; residual warmth finishes the cooking.
- → Can I use whole eggs instead of just yolks?
-
Whole eggs work fine and create a lighter curd with a slightly different texture. The balance of sugar and lemon remains the same; cook until it thickly coats a spoon.
- → Why strain the curd through a fine-mesh sieve?
-
Straining removes any cooked egg flecks or coarse bits of zest for a smooth, glossy finish—strain once for most uses, twice for extra-smooth fillings and jars.
- → How can I thicken the curd faster?
-
Maintain steady whisking over gentle heat and ensure the bowl bottom doesn’t touch the water. Higher heat speeds thickening but risks curdling, so patience yields best texture.
- → How should I store the curd and how long does it keep?
-
Cool completely, transfer to sterilized jars, seal and refrigerate. Properly chilled, it keeps up to two weeks. Use clean utensils to avoid contamination.
- → What are good dairy-free substitutes for butter?
-
Use a neutral-flavored plant-based butter or margarine that melts smoothly. Add it off the heat as with dairy butter to maintain a glossy, creamy texture.
