 Save to Pinterest
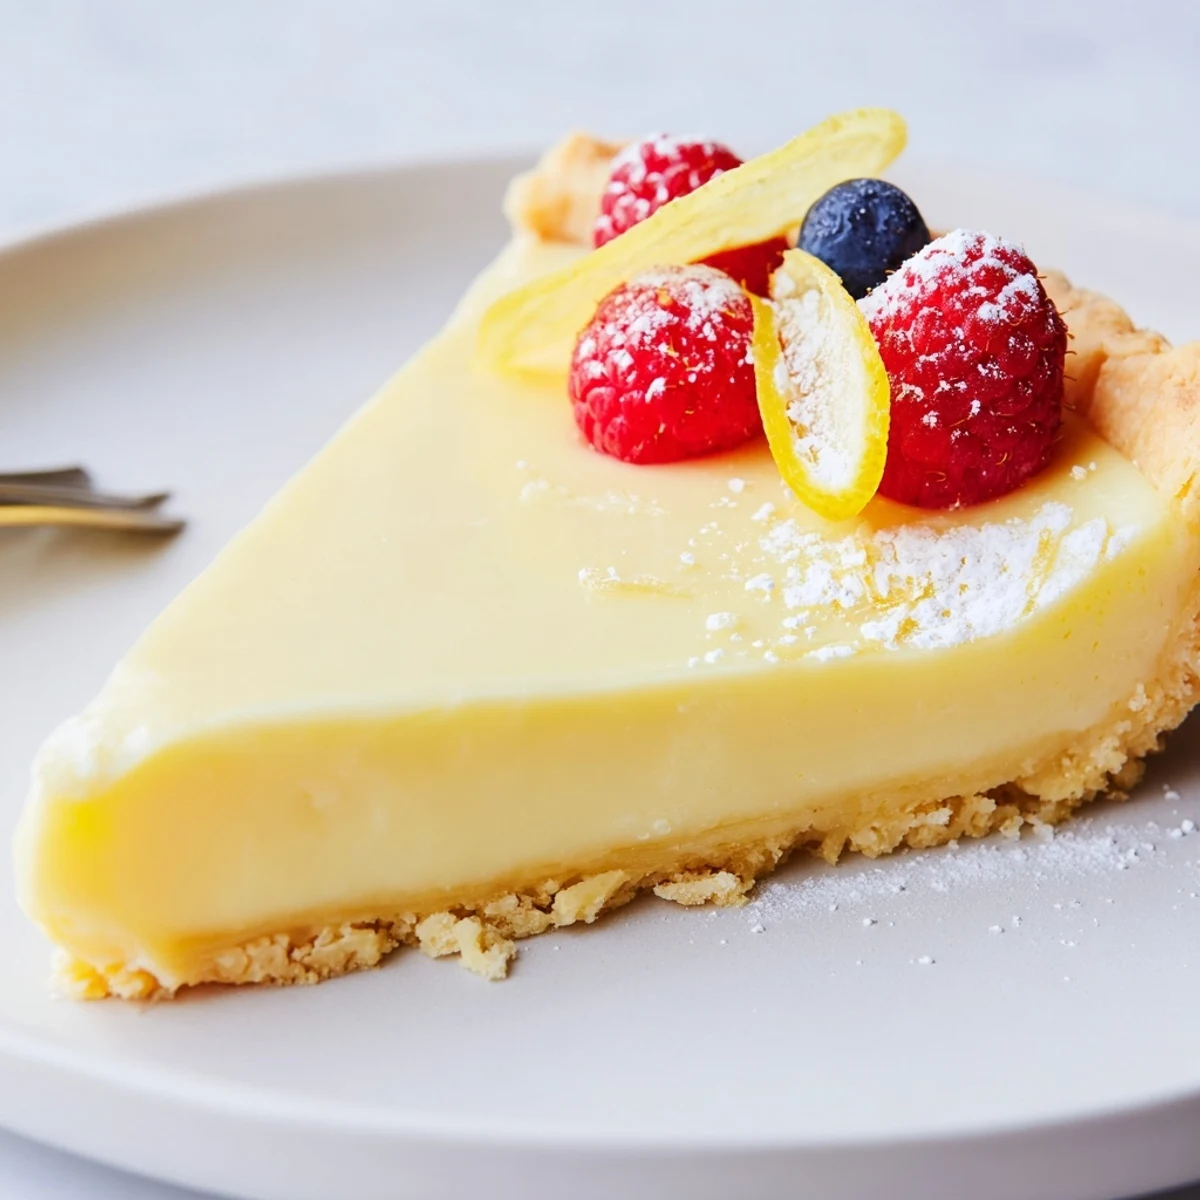
 This lemon tart combines a crisp, buttery shortcrust with a silky, custard-like lemon filling. Blind-bake a chilled 9-inch crust at 350°F until golden, then whisk heavy cream, sugar, eggs and yolks, lemon zest and juice until smooth. Bake at a lower temperature until edges are set but center still slightly jiggly, cool completely and refrigerate at least an hour. Finish with a dusting of powdered sugar and fresh berries for brightness.
The first time I made this creamy lemon tart, it was a gloomy afternoon that seemed to beg for a bolt of citrusy brightness. As the tart baked, a sweet lemon scent drifted through the kitchen, instantly lifting my mood and making me feel like I was conjuring a little sunshine indoors. I remember tapping the tart pan impatiently on the counter, watching the filling shimmer as it set. That anticipation before the first bite made the whole process feel just a bit magical.
I once brought this to a summer picnic, balancing the tart in my lap as we wound our way to the park. Our friends gathered around as I dusted on the final snowy layer of powdered sugar, the sunlight glancing off the glossy surface. The first slice wobbled a bit, but no one minded—by the time the plates came back, they were scraped clean. Even the skeptics went back for seconds, citrus grins and all.
Ingredients
- All-purpose flour: Trusty base for the crust; I keep mine in the freezer so it stays chilly and makes a tender dough.
- Powdered sugar: This adds a subtle sweetness that melts smoothly into the pastry—no gritty texture here.
- Salt: Just enough to balance the sweet and bring out the lemon.
- Unsalted butter: Cold cubes create those glorious buttery flakes in the crust; don't overmix for best layering.
- Egg yolk: A little richness for both crust and custard, binding everything just right.
- Cold water: Add gradually—watch for the dough to clump, then stop for the perfect texture.
- Heavy cream: This gives the filling that silky mouthfeel that stays smooth even after chilling.
- Granulated sugar: Balancing tart citrus with a gentle sweetness drawn from experience (and several too-tart attempts).
- Eggs and egg yolks: The backbone of a classic custard; I crack them into a separate bowl to avoid shell mishaps.
- Lemon zest: Use fresh lemons and a fine grater—it perfumes the whole house.
- Fresh lemon juice: Worth squeezing by hand, even if it gets a little messy; bottled just isn’t the same.
- Pinch of salt: It’s small, but you miss it if you forget—trust me.
- Powdered sugar, berries, or candied lemon: Not essential, but they make for a picture-perfect finish and extra flavor.
Instructions
- Prep your workspace:
- Preheat the oven to 350°F (175°C), and gather all your ingredients out—those lemons won’t zest themselves.
- Make the crust:
- In your food processor, pulse flour, powdered sugar, and salt together, listening for that soft whir as things blend smoothly.
- Cut in the butter:
- Add those cold cubes of butter, pulsing just until you see small pebbly bits—it should look a bit like damp sand.
- Bring dough together:
- Add in the egg yolk and a couple of tablespoons of cold water, pulsing until the dough just starts to form clumps; use your fingers to squeeze a bit to check if it holds.
- Shape and chill:
- Turn out the mixture onto a lightly floured counter, gently gather it into a disk, wrap snugly, and chill for half an hour—the rest lets the flour relax.
- Roll and line the pan:
- Roll the dough to about 1/8-inch thickness, then ease it into a 9-inch tart pan, pressing gently into the edges; trim, prick with a fork, and freeze for a quick ten minutes.
- Blind bake:
- Cover the crust with parchment, fill with pie weights or beans, and bake for 15 minutes; remove weights then bake another 8 to 10 until golden—breathe in that toasty aroma.
- Cool the crust:
- Set aside the crust to cool just enough so you can touch the pan without wincing.
- Mix the filling:
- Lower oven to 300°F (150°C); whisk together cream, sugar, eggs, yolks, lemon zest and juice, and salt in a bowl until smooth and bright.
- Fill and bake:
- Pour the lemon mixture into the crust and carefully slide it into the oven; bake until the edges are set but the center still trembles slightly, about 20–25 minutes.
- Chill and serve:
- Let the tart cool completely, then refrigerate for at least an hour—it keeps the filling lush; dust with sugar and garnish as your heart desires.
 Save to Pinterest
 The day my niece asked if she could help zest the lemons was when this tart became more than dessert—it was a happy little kitchen partnership. Hearing her giggle as citrus oils misted the air, I realized these shared moments stick around long after the last forkful is gone.
Making It Your Own
Over time, I've added raspberry swirls to the filling and swapped in Meyer lemons for a floral note—the recipe handles little tweaks beautifully. Seasonal garnishes keep it feeling special, whether that's a tumble of summer berries or tiny edible flowers in spring.
Serving and Storage Tips
Leftovers chill beautifully—I've had slices still perfectly set and vibrant two days later. Let the tart stand at room temp about 10 minutes before slicing for the cleanest cuts; the crust keeps its snappy edge.
Common Mistakes I Used to Make
I once tried skipping the parchment and pie weights, ending up with a ballooned crust and nowhere for the filling to sit. Learning to trust the process (and not tinker too much) saved me lots of time and heartache.
- Let filling cool before chilling to avoid condensation.
- Don’t zest too deeply—white pith is bitter.
- Save some lemon zest for a sprinkle on top—it’s a simple touch with big flavor.
 Save to Pinterest
 However you garnish or serve it, this creamy lemon tart is always a bright spot on the table. I hope it brings you as much cheerful satisfaction as it’s brought to my kitchen.
Recipe FAQs
- → How can I prevent the filling from cracking?
-
Avoid overmixing and overbaking. Bake the filling at a moderate temperature until the edges are set and the center still jiggles slightly; residual heat will finish the set as it cools. Cooling gradually and chilling before slicing reduces surface cracks.
- → What’s the best way to blind-bake the crust?
-
Chill the formed crust, then line with parchment and fill with pie weights or dried beans. Bake until the base is lightly golden, remove weights, and return to the oven briefly to dry the surface—this creates a crisp, non-soggy shell.
- → Can I make the tart ahead of time?
-
Yes. Bake and fully cool the tart, then refrigerate for at least an hour before serving. It keeps well chilled for 2–3 days; store covered to protect the crust from moisture.
- → How can I make a gluten-free crust?
-
Use a gluten-free flour blend formulated for pastries and handle the dough gently to avoid crumbliness. You may need a touch more liquid; chill thoroughly before rolling and blind-bake as usual to firm the shell.
- → Are there simple swaps for the filling’s dairy?
-
For a lighter texture, use half-and-half in place of heavy cream, but the filling will be less rich. For a tangier finish, a small addition of crème fraîche after baking can add brightness without thinning the set.
- → How do I get an ultra-smooth, silky filling?
-
Whisk the eggs and yolks with the sugar until fully combined, then add cream, lemon zest and juice and strain the mixture through a fine sieve into the crust to remove any bits. Gentle whisking and a low bake temperature yield a custard-like texture.
